Ho, Ho, Ho...shhhh... it's parent Christmas gifts
We made these adorable little reindeer ornaments for our parents today. They were so easy and inexpensive. This is the 2nd year that I've made them with a few new modifications this year.
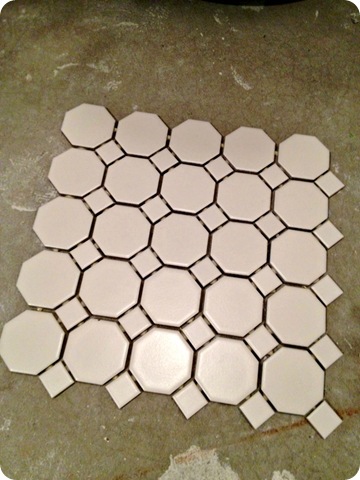
To start, I bought a sheet of white hexagon shaped floor tiles from Home Depot. I think the whole sheet cost all of $3.00 if I remember correctly (I bought this sheet last year and had enough left over for this year's class) There were 36 little hexagon tiles on a sheet. I started by cutting apart the sheet and then separated the hexagons and the squares. I'm not sure what I'll do with the squares, but they were too cute to throw away... maybe good for sorting/counting activities?? They'll likely see the garbage during spring cleaning if they're still in the cupboard without a use this year.

After separating, I used a scissors to quickly cut off the excess adhesive that originally held them together. Next, I had my kiddos come up 1 at a time to do their thumbprint. I had them write their names on the back of the tile along with the year with a Sharpie before we started. I wanted the kiddos to do it so moms and dads have a handwriting remembrance. I then used a foam brush to quickly paint an even layer of paint on their thumb and then they pressed it onto the tile. We used acrylic paint that I picked up from Wal-mart. The color was Burnt Umber and cost a whopping 89 cents. This little bottle will last you umpteen years! I did all of my class in about 10 minutes (fingerprints only at this time) We let them dry over the lunch hour, but to be honest, they are dry enough within 15-30 minutes for the next step if you don't make the prints too thick. You can see the difference between a one which is a bit thick and one that I consider just right to the left. I like it when you can see the swirls of the fingerprint a bit so parent know it's a print.
 |
| A 15 point buck! |
After letting the paint dry, I call kiddos to my kidney table 3 at a time for the next step. This step turns the ordinary fingerprint into an adorable reindeer ornament with a Sharpie marker, some white paint and a little bit of puffy paint. As the kids come back they use a brown Sharpie marker (I bought 3 last year at Home Depot at Christmas time when you could buy individual colors.I think they were about $1.50 each) to draw on the antlers. We do this first so they won't smudge the paint we are about to put on. Once their antlers are done I have them dip the end of a different Sharpie marker into some white acrylic paint (yup, another bottle from Wal-mart) and dab it onto their print where they want their eyes to be. I model this for them so they don't over dip and they do a fantastic job. Next, they use black puffy paint to squirt 2 dots on the white for the pupils and then squeeze some red puffy paint onto the bottom of their print for a Rudolph nose. I honestly can't tell you how much the black and red puffy paint costs as I bought it for other projects many years ago... but that being said, once you buy, you won't likely need to buy more again for MANY years with just a dob here and a dob there.
We then let them sit overnight to completely dry and set up.
The next day I hot glue on a loop of cute sparkly silver ribbon that they can hang their ornament from the tree from. I always buy my ribbon after the holiday to get it 50% or more off. Each spool usually lasts me 2-3 years depending on how many kiddos I have and I big I make the loops. (I usually have about 18 kiddos in my class) and viola- you have a cute, inexpensive ornament that is a personalized remembrance for parents. I use to do the handprint snowmen ornaments but they started to get expensive and messy to do. THese are so much easier and more durable as well.


No comments:
Post a Comment